How to Set Up Your Business Details
Learn how to configure your company information, business hours, office address and regional settings in WorkNinja.
Keeping your business details up to date ensures your company information is accurate and that jobs are scheduled within your normal working hours.
1. Access Your Company Details
To manage your business settings:
Log in to your WorkNinja dashboard.
Navigate to Settings.
Select Company Details.
From this page, you can manage your company information, business hours, office address and regional preferences.
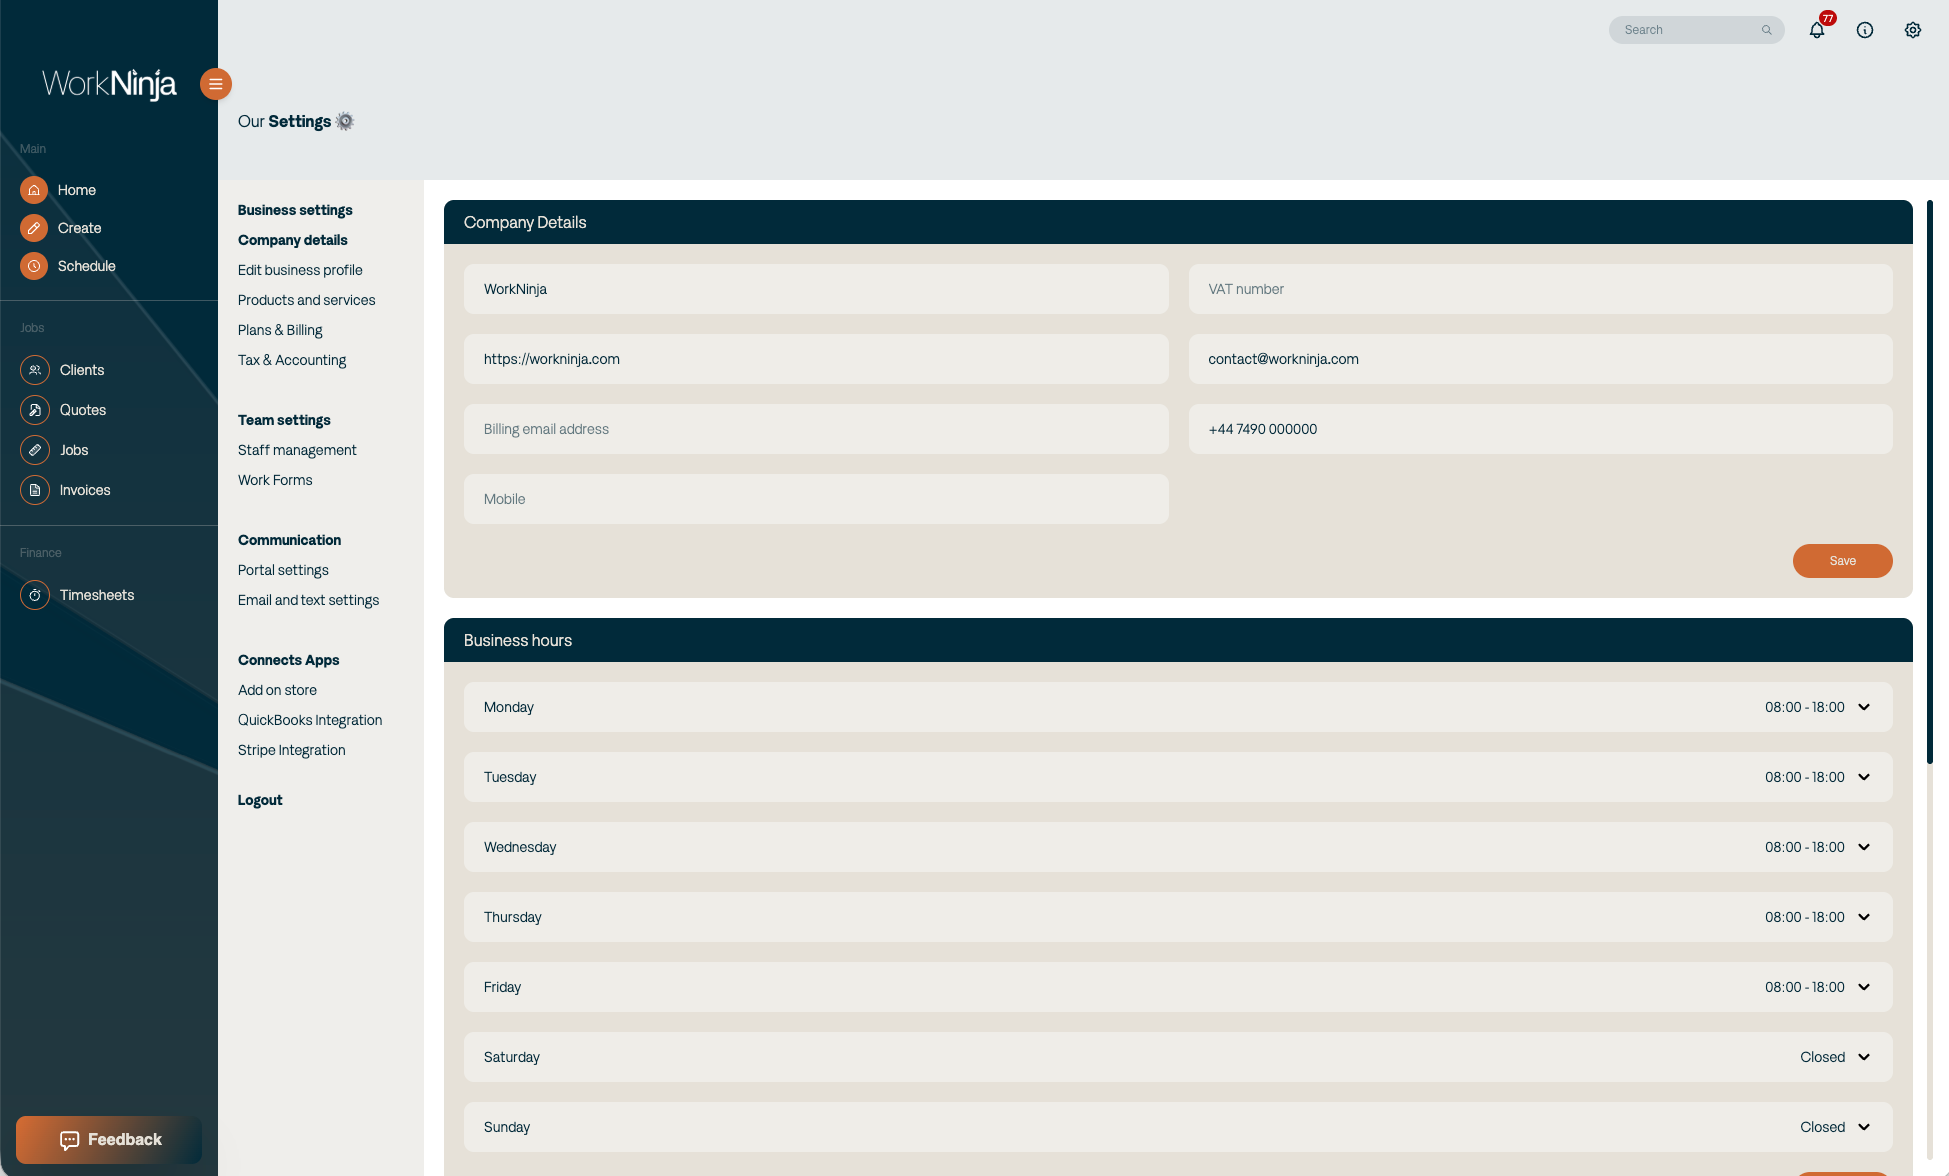
2. Add Your Company Information
Under Company Details, you can enter or update the following information:
Company Name: Your registered or trading business name.
VAT Number: Your company VAT registration number, if applicable.
Website Address: Your business website URL.
Email Address: Your main business email address.
Billing Email Address: Your preferred email address for billing correspondence.
Phone Number: Your main business contact number.
Mobile Number: Your business mobile number.
Once you've entered your information, click Save to apply your changes.
3. Set Your Business Days and Hours
WorkNinja allows you to configure your normal operating days and hours. These settings help ensure that jobs are scheduled during the times your business is available.
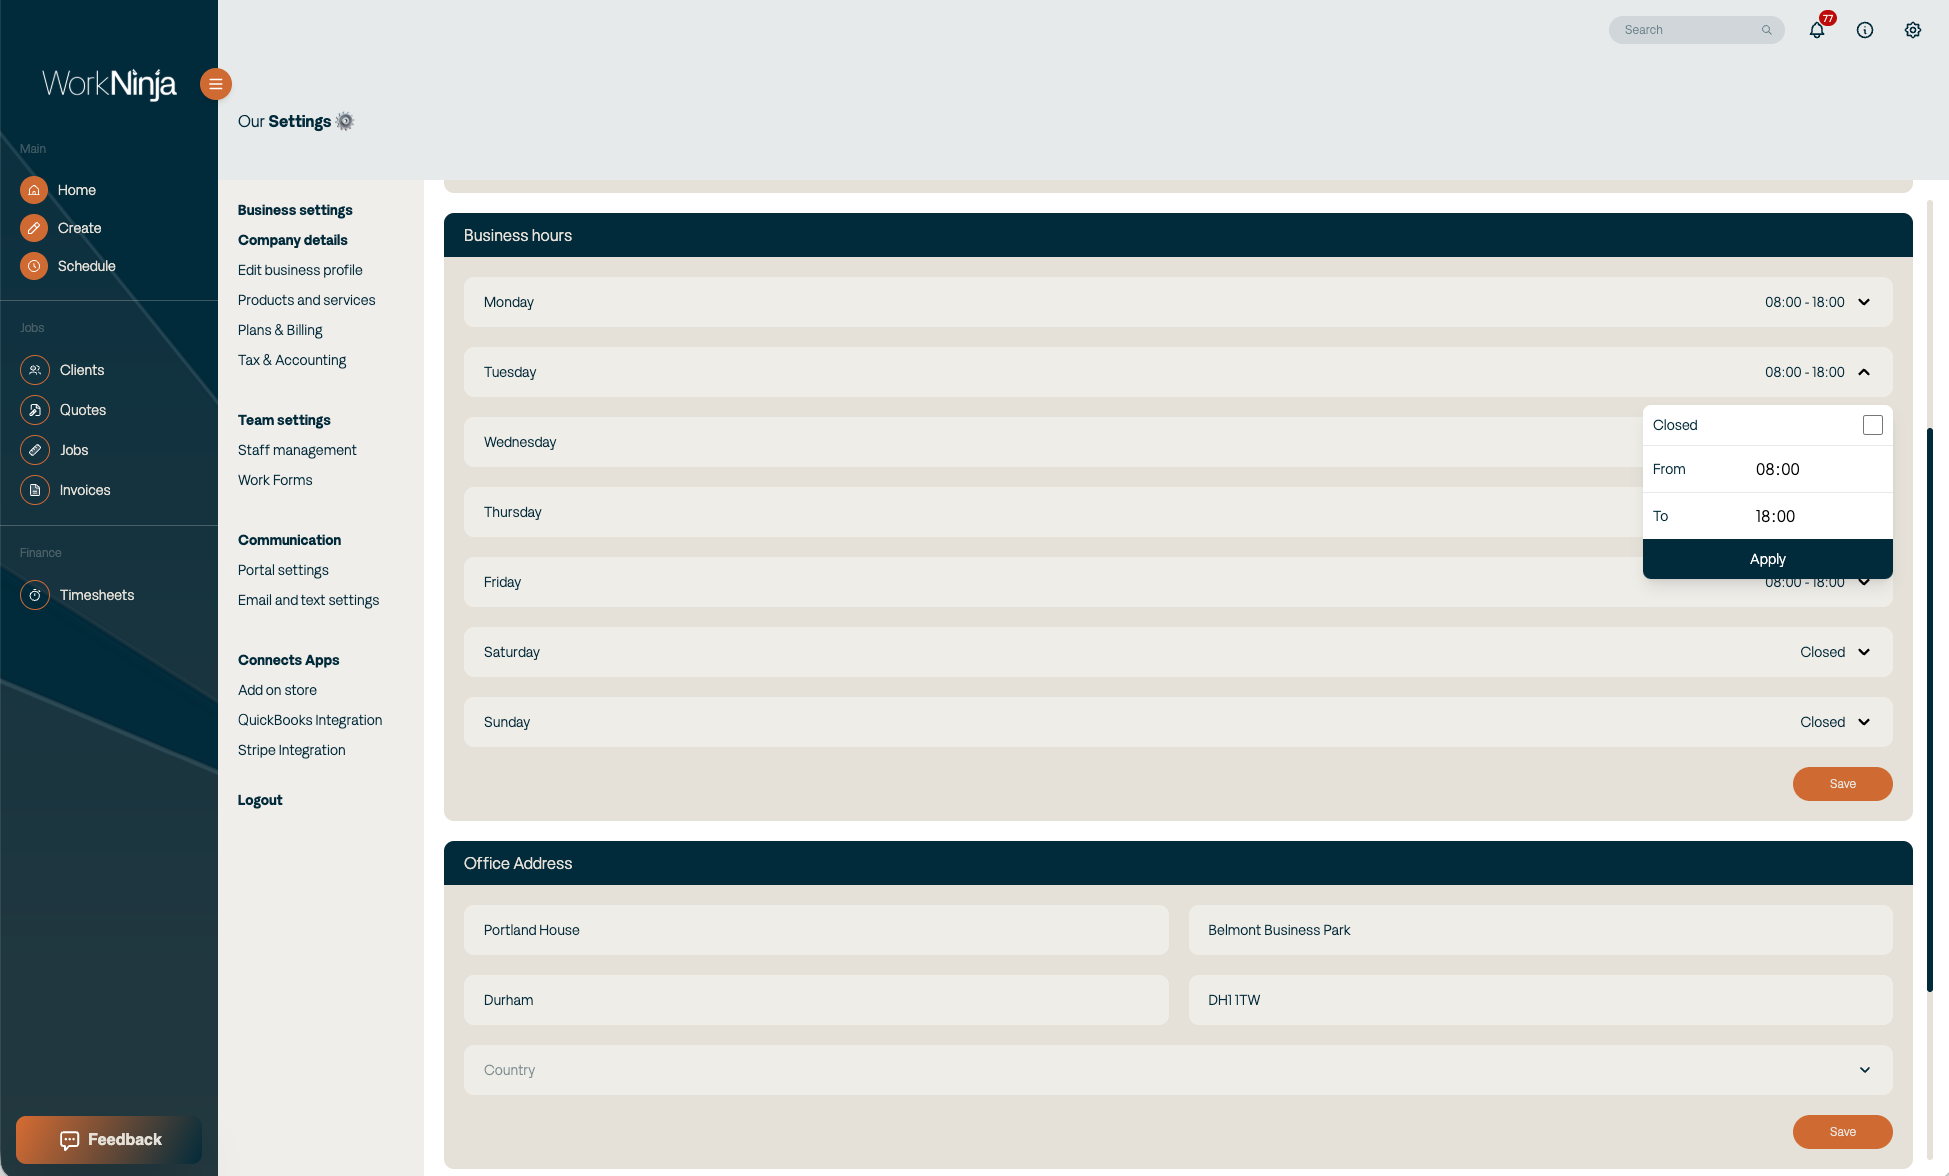
To configure your working hours:
Locate the Business Days & Hours section.
Select the days your business operates.
Mark each day as either Open or Closed.
For open days, choose your business's start and finish times.
Click Save to confirm your changes.
How does this affect scheduling?
Your business hours are used by the WorkNinja scheduler to determine when jobs can be scheduled.
Open days: Jobs can be scheduled within your configured operating hours.
Closed days: These days are blocked out on the scheduler, preventing jobs from being scheduled.
Operating hours: The scheduler uses your opening and closing times to prevent jobs from being scheduled outside your business hours.
For example, if your business operates Monday to Friday between 8:00 am and 5:00 pm, you can configure those hours and mark Saturday and Sunday as closed.
4. Add Your Office Address
You can also configure your business's main office address.
The available fields include:
Address Line 1
Address Line 2
City
Postcode
Country
Enter your business address and click Save to update your details.
5. Configure Your Regional Settings
The Regional Settings section allows you to customise how dates and times are displayed throughout WorkNinja.
You can configure:
Country
Select the country in which your business operates.
Time Zone
Choose your business's time zone to ensure scheduling information is displayed correctly.
Date Format
Choose your preferred date format:
DD/MM/YYYY – Day, month, year
MM/DD/YYYY – Month, day, year
YYYY/MM/DD – Year, month, day
Time Format
Choose between a 12-hour clock (AM/PM).
Once you've selected your preferences, click Save.
6. Saving Your Changes
Each section of the Company Details page has its own Save button.
Make sure you save your changes within each section before navigating away from the page.
Your updated business settings will then be applied throughout the relevant areas of WorkNinja.
Was this helpful?
Still need help? Ask the team