How to Connect and Use Xero with WorkNinja
WorkNinja can connect directly with Xero, allowing you to link customer records, sync invoices and keep payment statuses aligned between the two platforms.
Written By Matthew Smith
Last updated About 2 hours ago
Once connected, you can also use your Xero tax rates and accounting codes within WorkNinja.
This guide explains how to connect Xero, configure your accounting settings and sync clients and invoices.
Connecting Your Xero Account
To connect Xero, go to:
Settings → Add On Store → Xero
Select Connect.
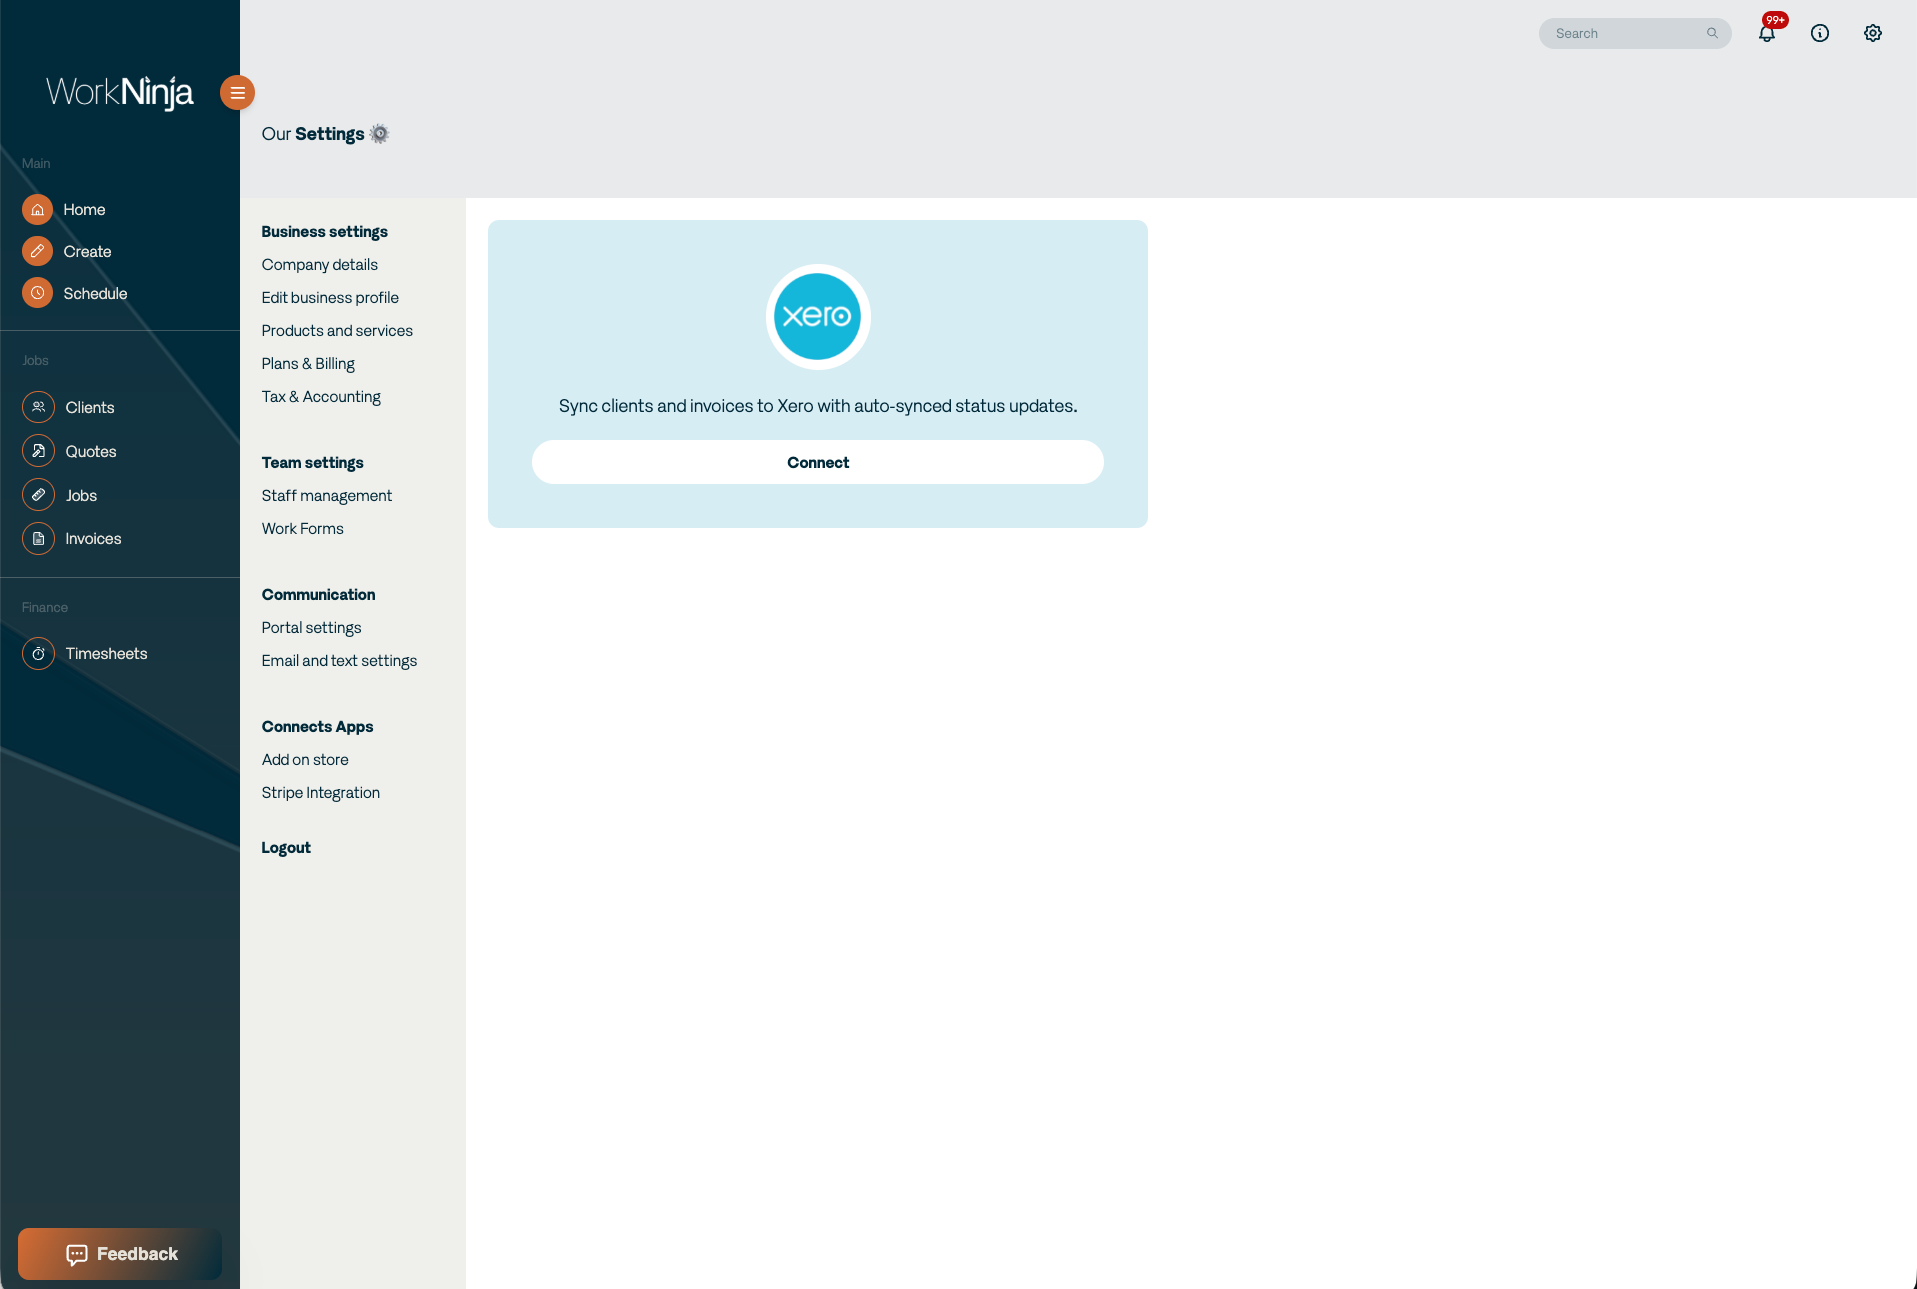
You will be redirected to Xero, where you will need to log in to your Xero account.
Once logged in, Xero will ask you to authorise WorkNinja to access your account.
Review the permissions and allow the connection.
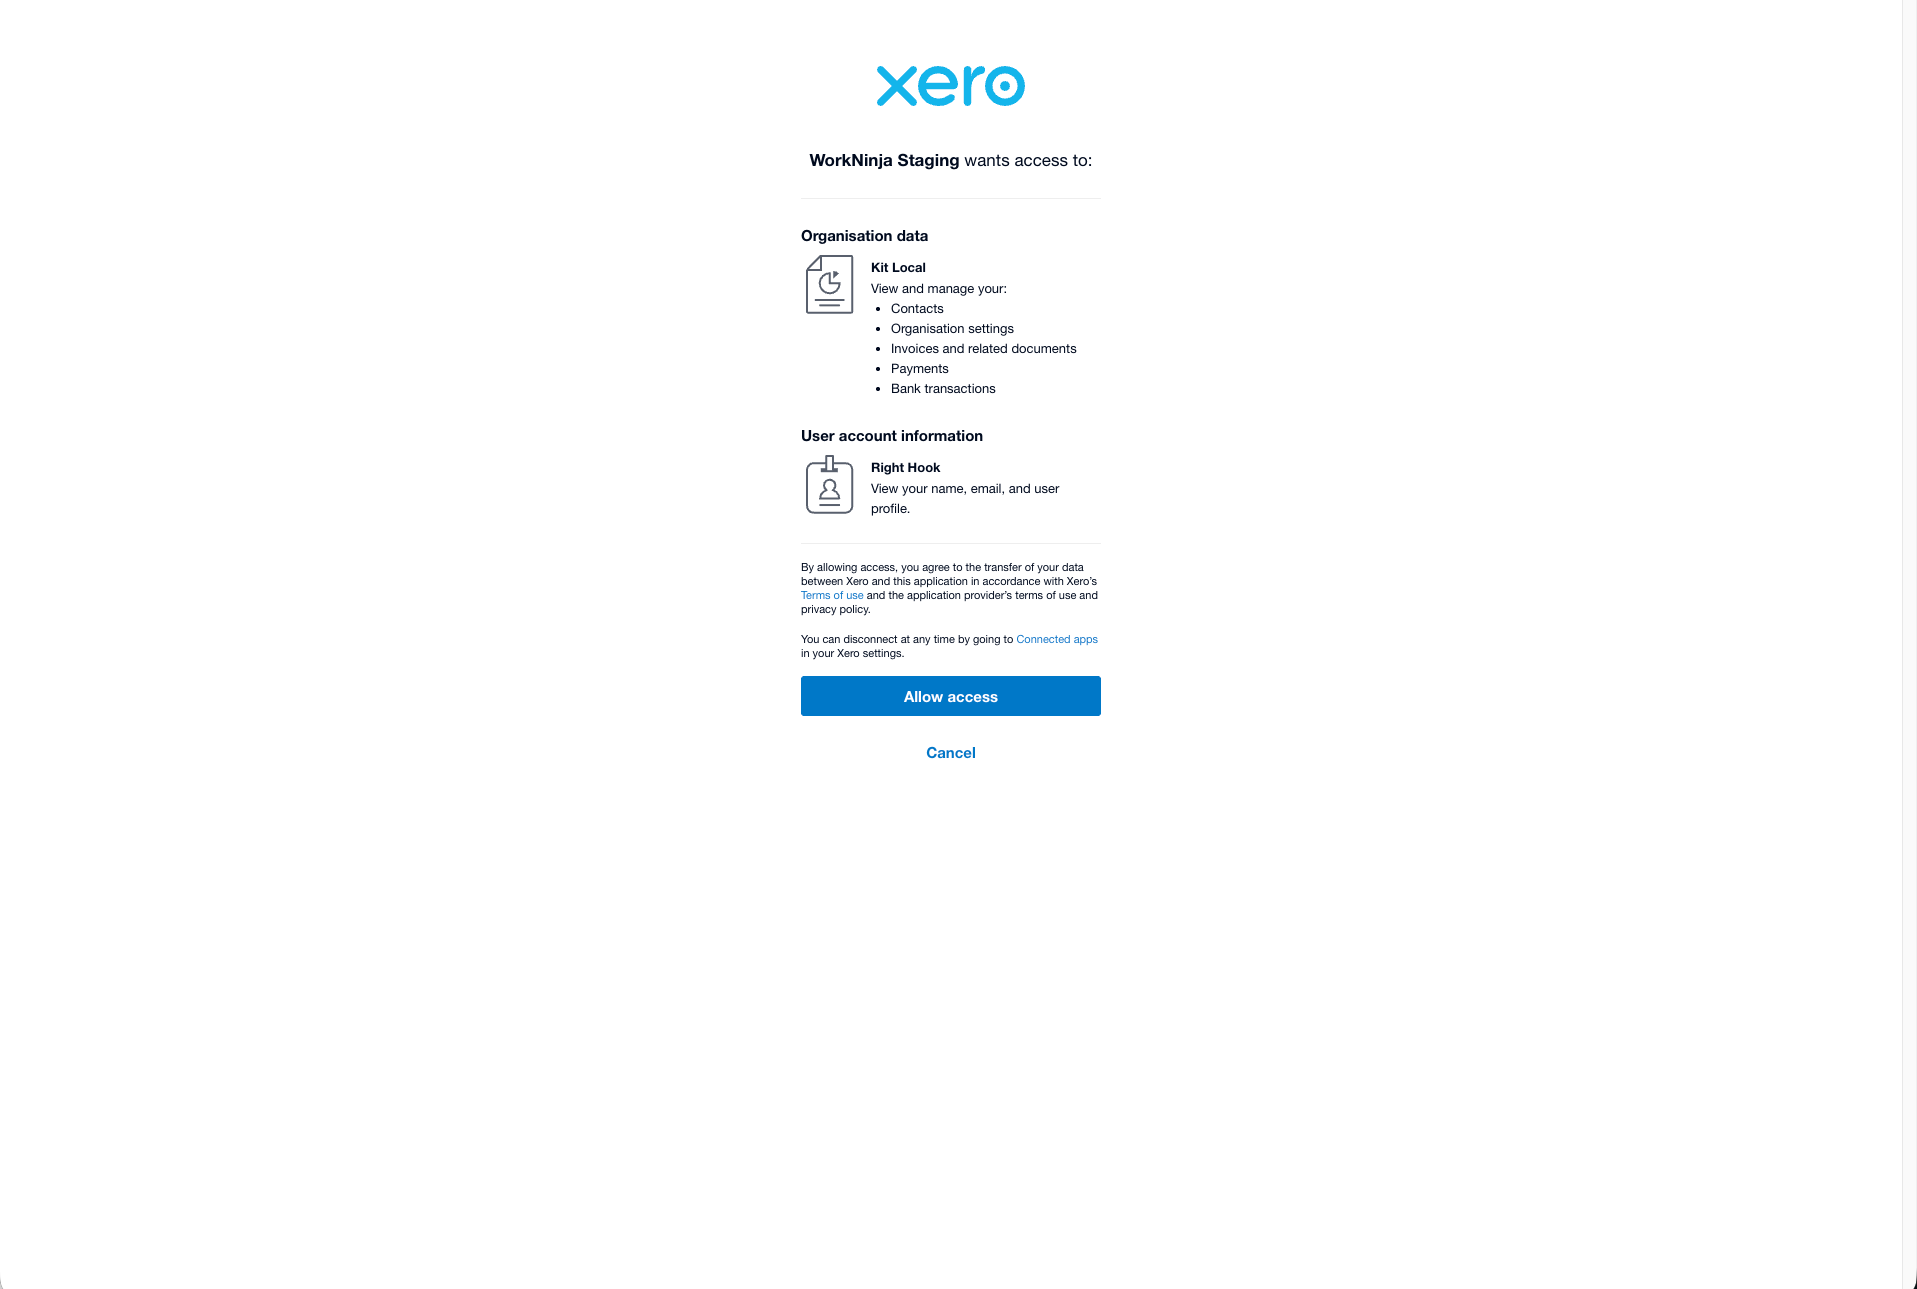
Once authorised, you will be returned to WorkNinja and the Xero integration will be connected.
Configuring Tax & Accounting Settings
After connecting Xero, visit the Tax & Accounting area within your WorkNinja Business Settings.
Go to:
Settings → Tax & Accounting
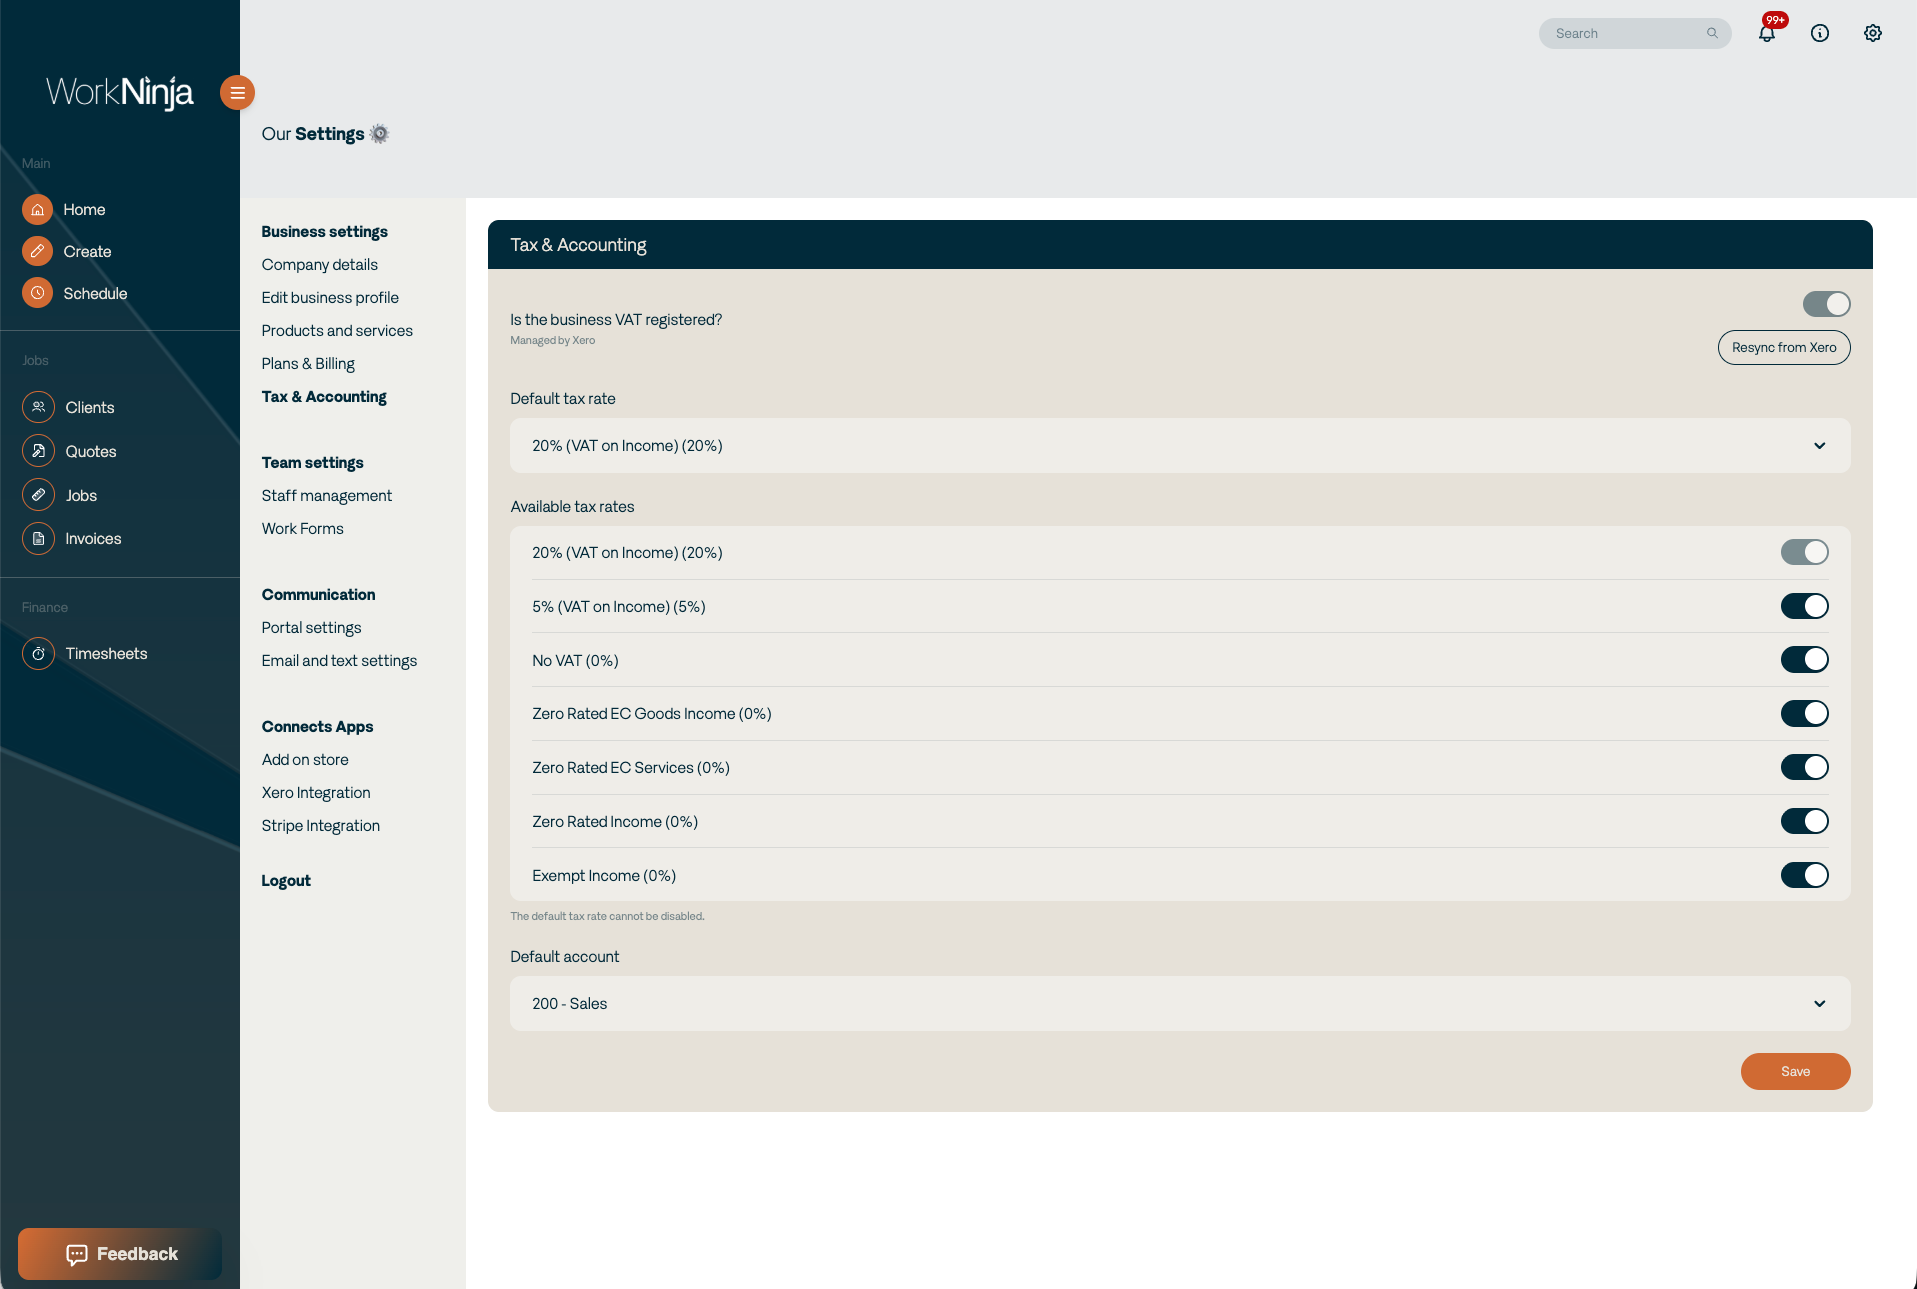
This area controls how tax rates and accounting information are handled within WorkNinja
Using Your Xero Tax Rates
When Xero is connected, your available tax rates will automatically pull through from Xero.
You can control which of these tax rates should be available for your team to use inside WorkNinja by toggling individual rates on or off.
This means you do not have to display every Xero tax rate if your business only regularly uses a small number of them.
Setting a Default Tax Rate
You can choose a Default Tax Rate within your Tax & Accounting settings.
The selected rate will automatically be applied to new line items by default.
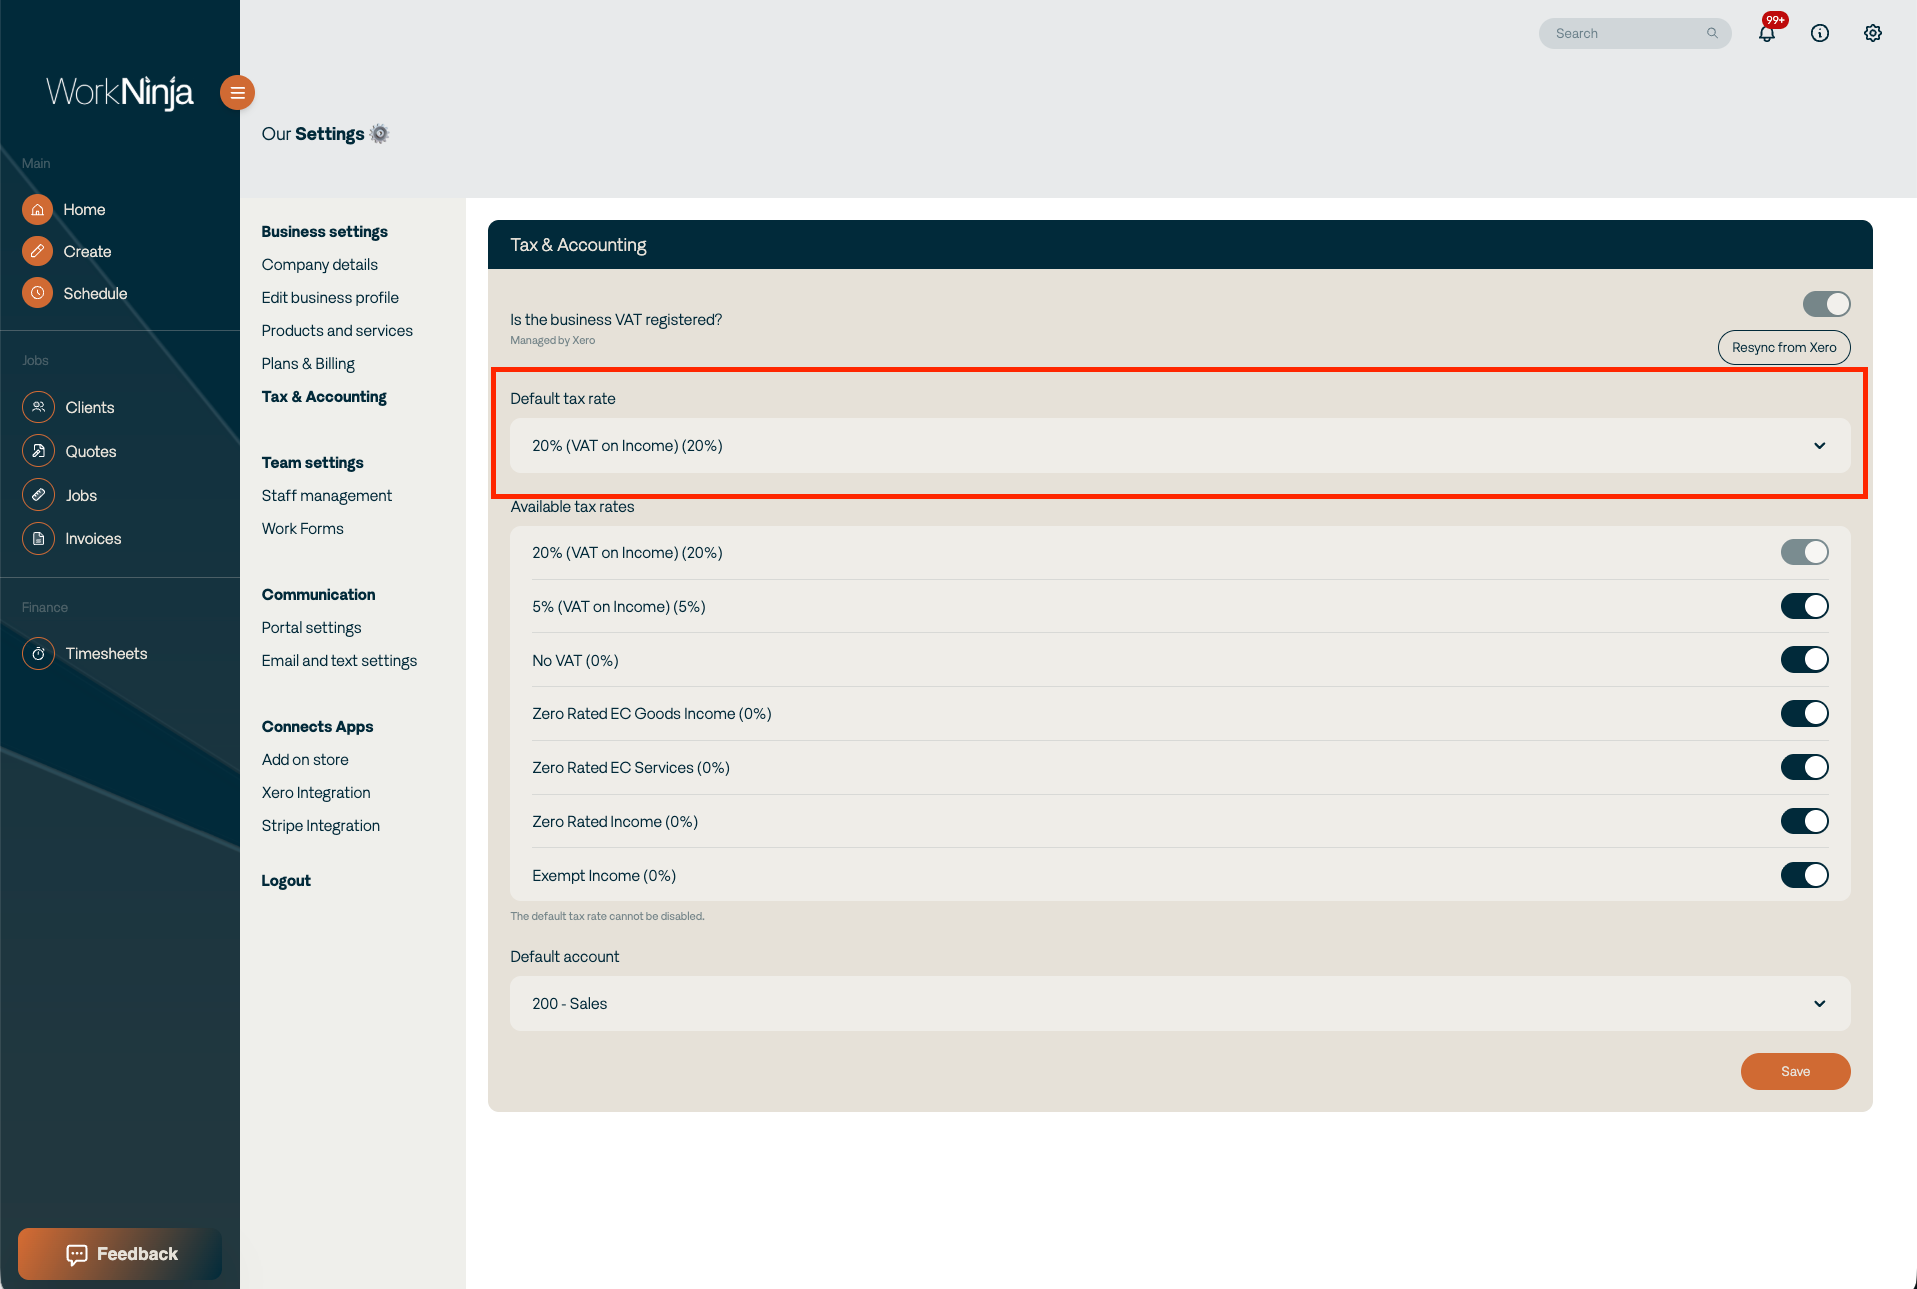
Users can still select another available tax rate where required.
Setting an appropriate default can make creating quotes, jobs and invoices quicker where your business normally uses the same tax rate.
Setting a Default Xero Account
You can also select the default Xero account that WorkNinja should use when posting applicable items to Xero.
For example:
200 – Sales
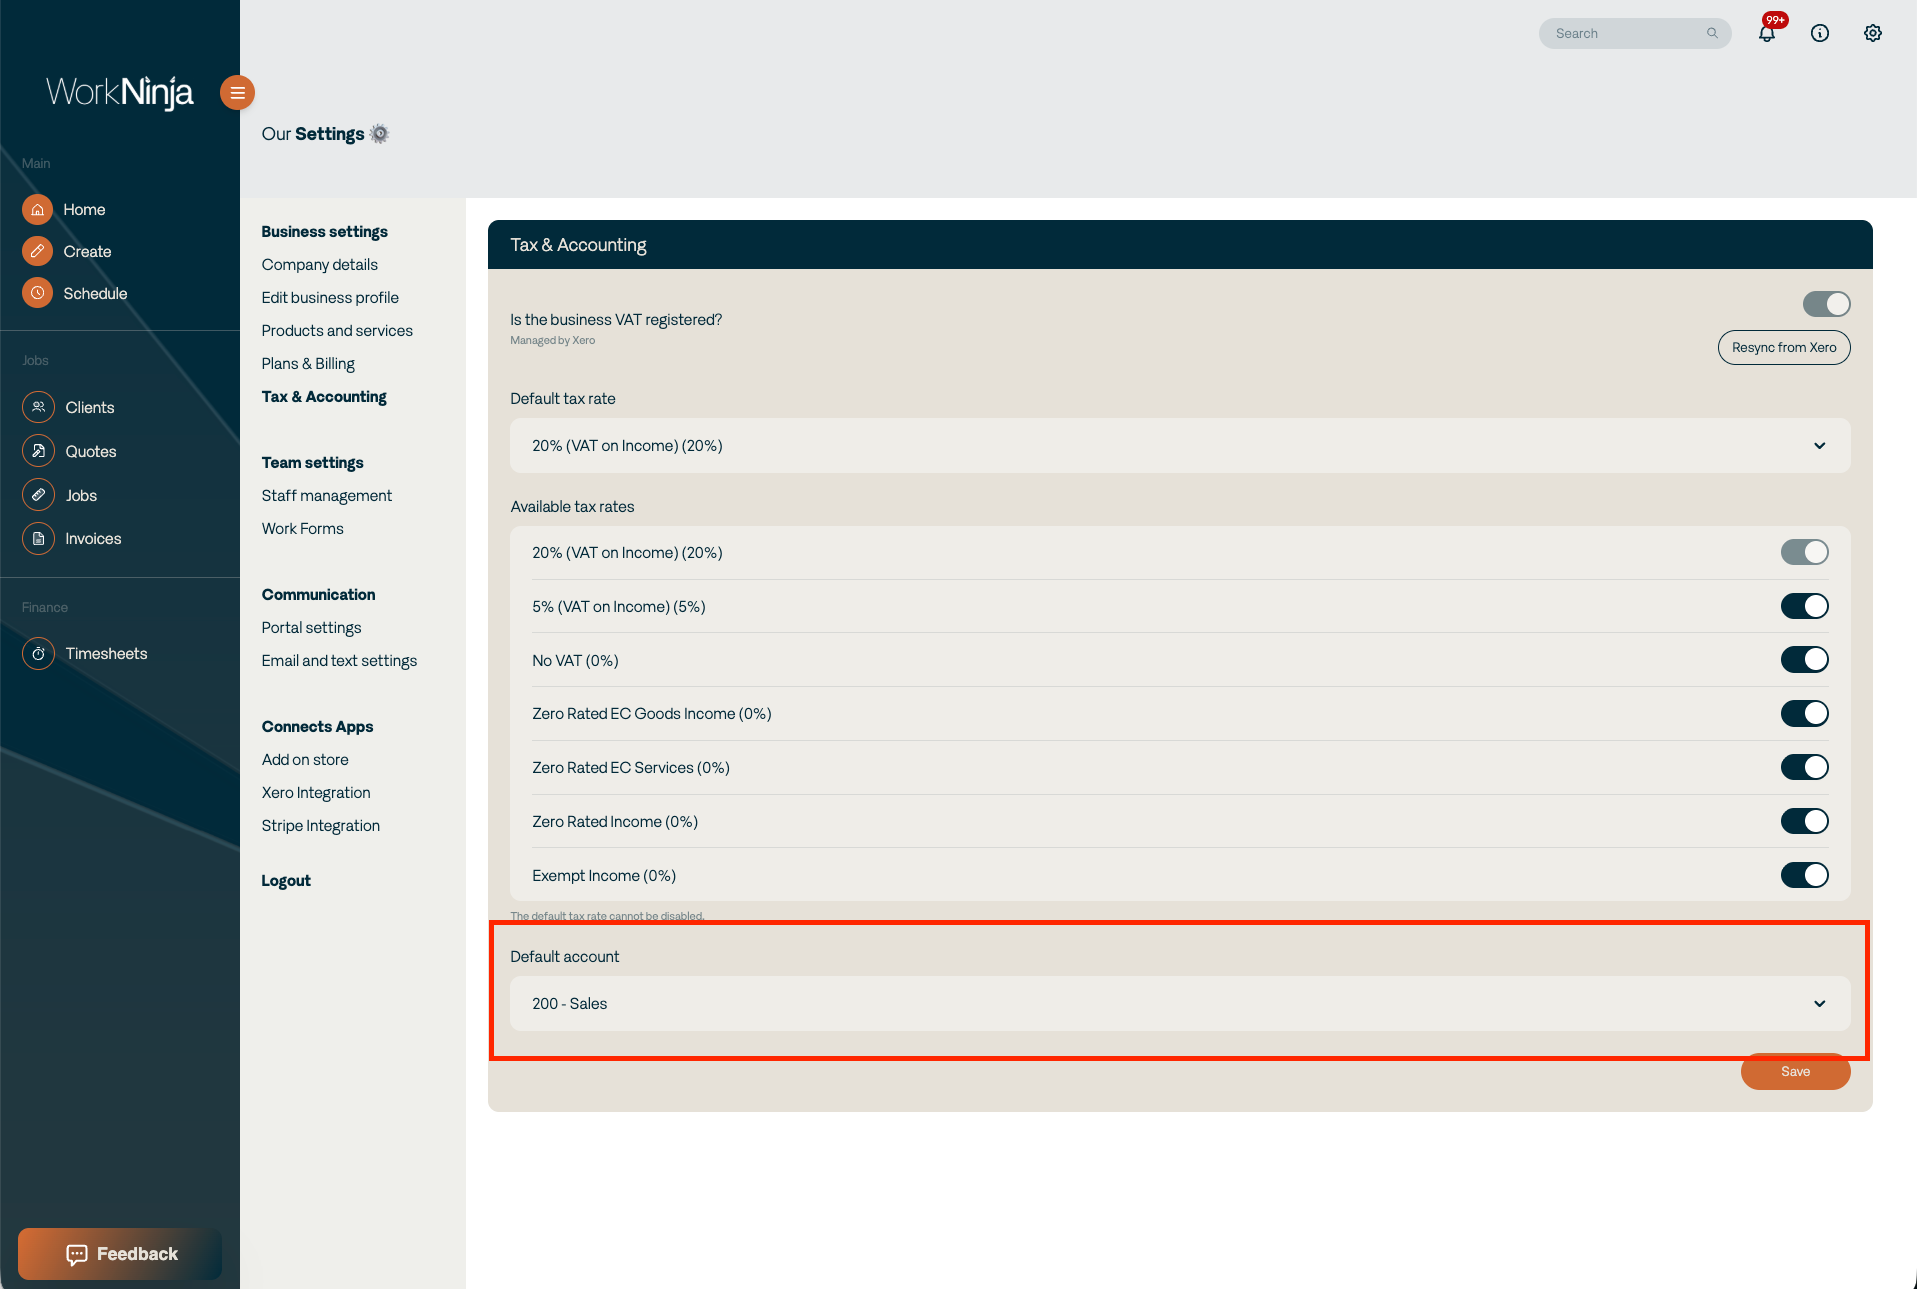
Choose the account that best matches how you want your WorkNinja sales to be recorded within Xero.
Syncing Clients with Xero
Once Xero has been connected, a new Xero column will appear within the Clients area.
Go to:
Clients
You will see a sync option alongside eligible clients.
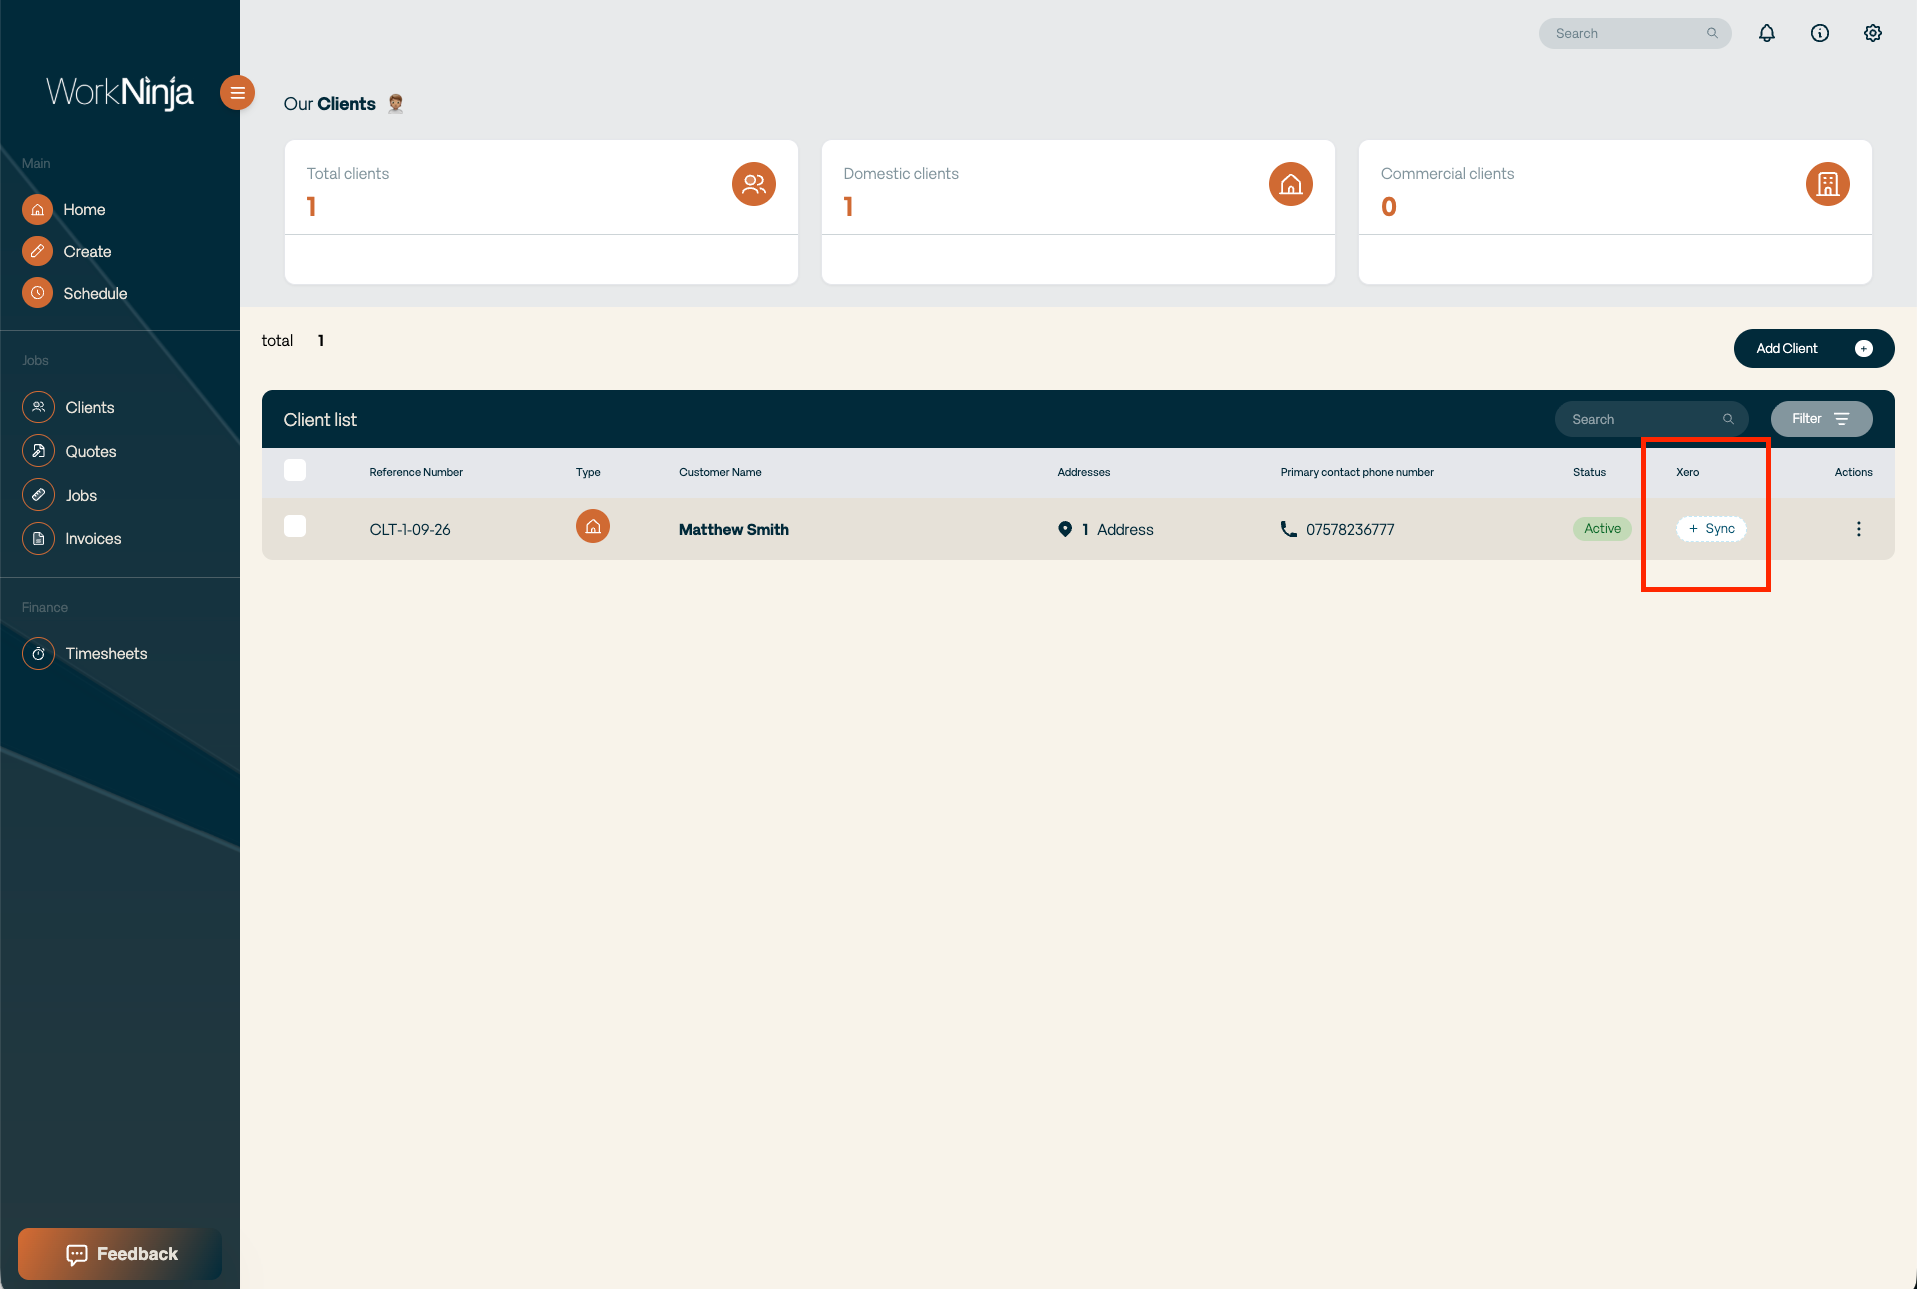
Before an invoice can be synced to Xero, its client must first be linked to a Xero contact.
Creating a New Client in Xero
To sync a WorkNinja client, select the Sync button alongside the customer.
A menu will appear allowing you to either:
Create a new record in Xero
Link to an existing Xero record
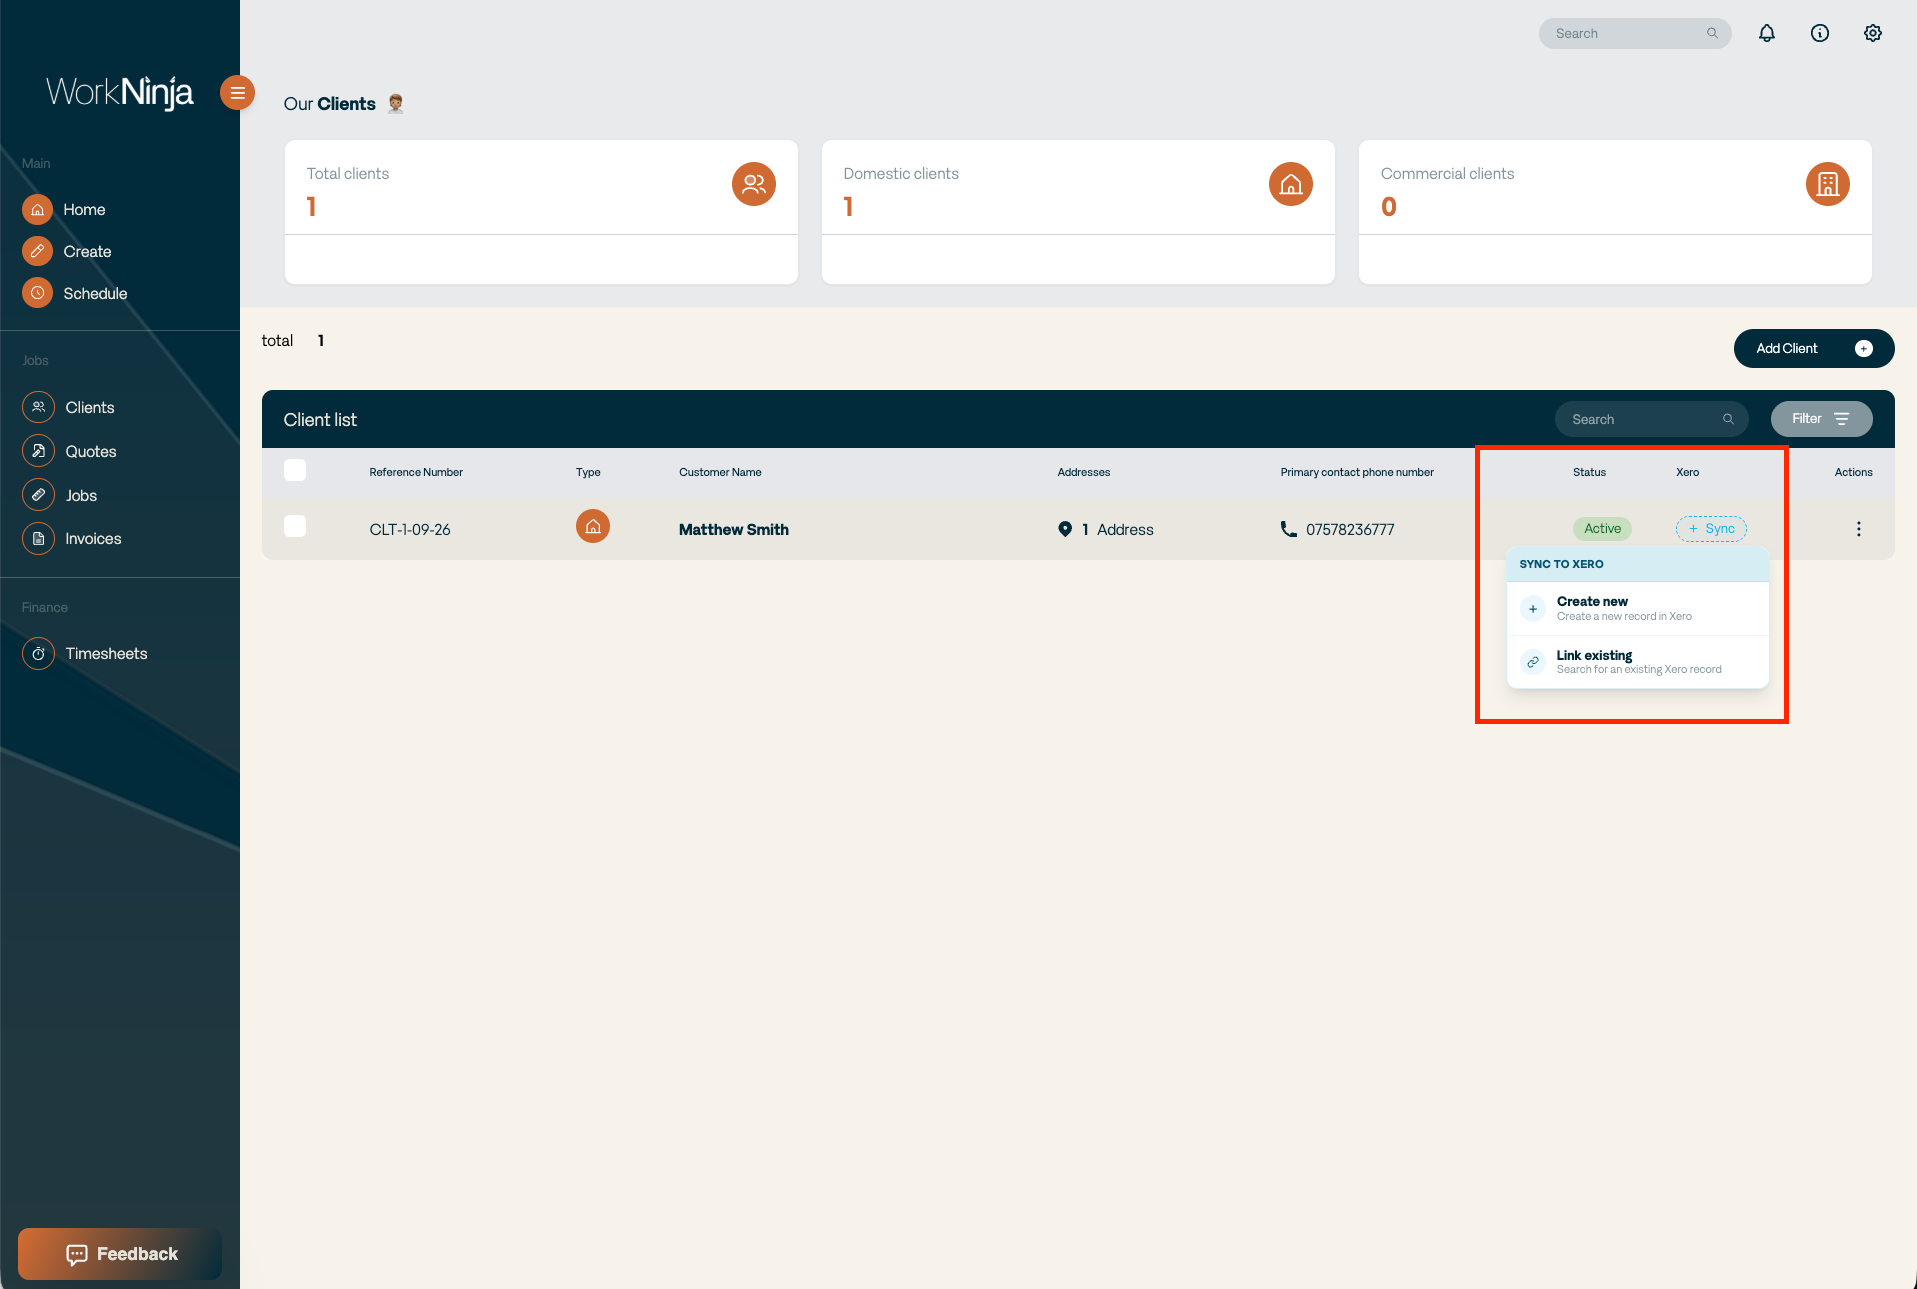
Choose Create New where the customer does not already exist within Xero.
WorkNinja will then create the corresponding customer record in Xero and link the two records together.
Linking to an Existing Xero Client
If the customer already exists in Xero, choose the option to Link to Existing.
Search for the appropriate Xero contact and connect it to the WorkNinja client.
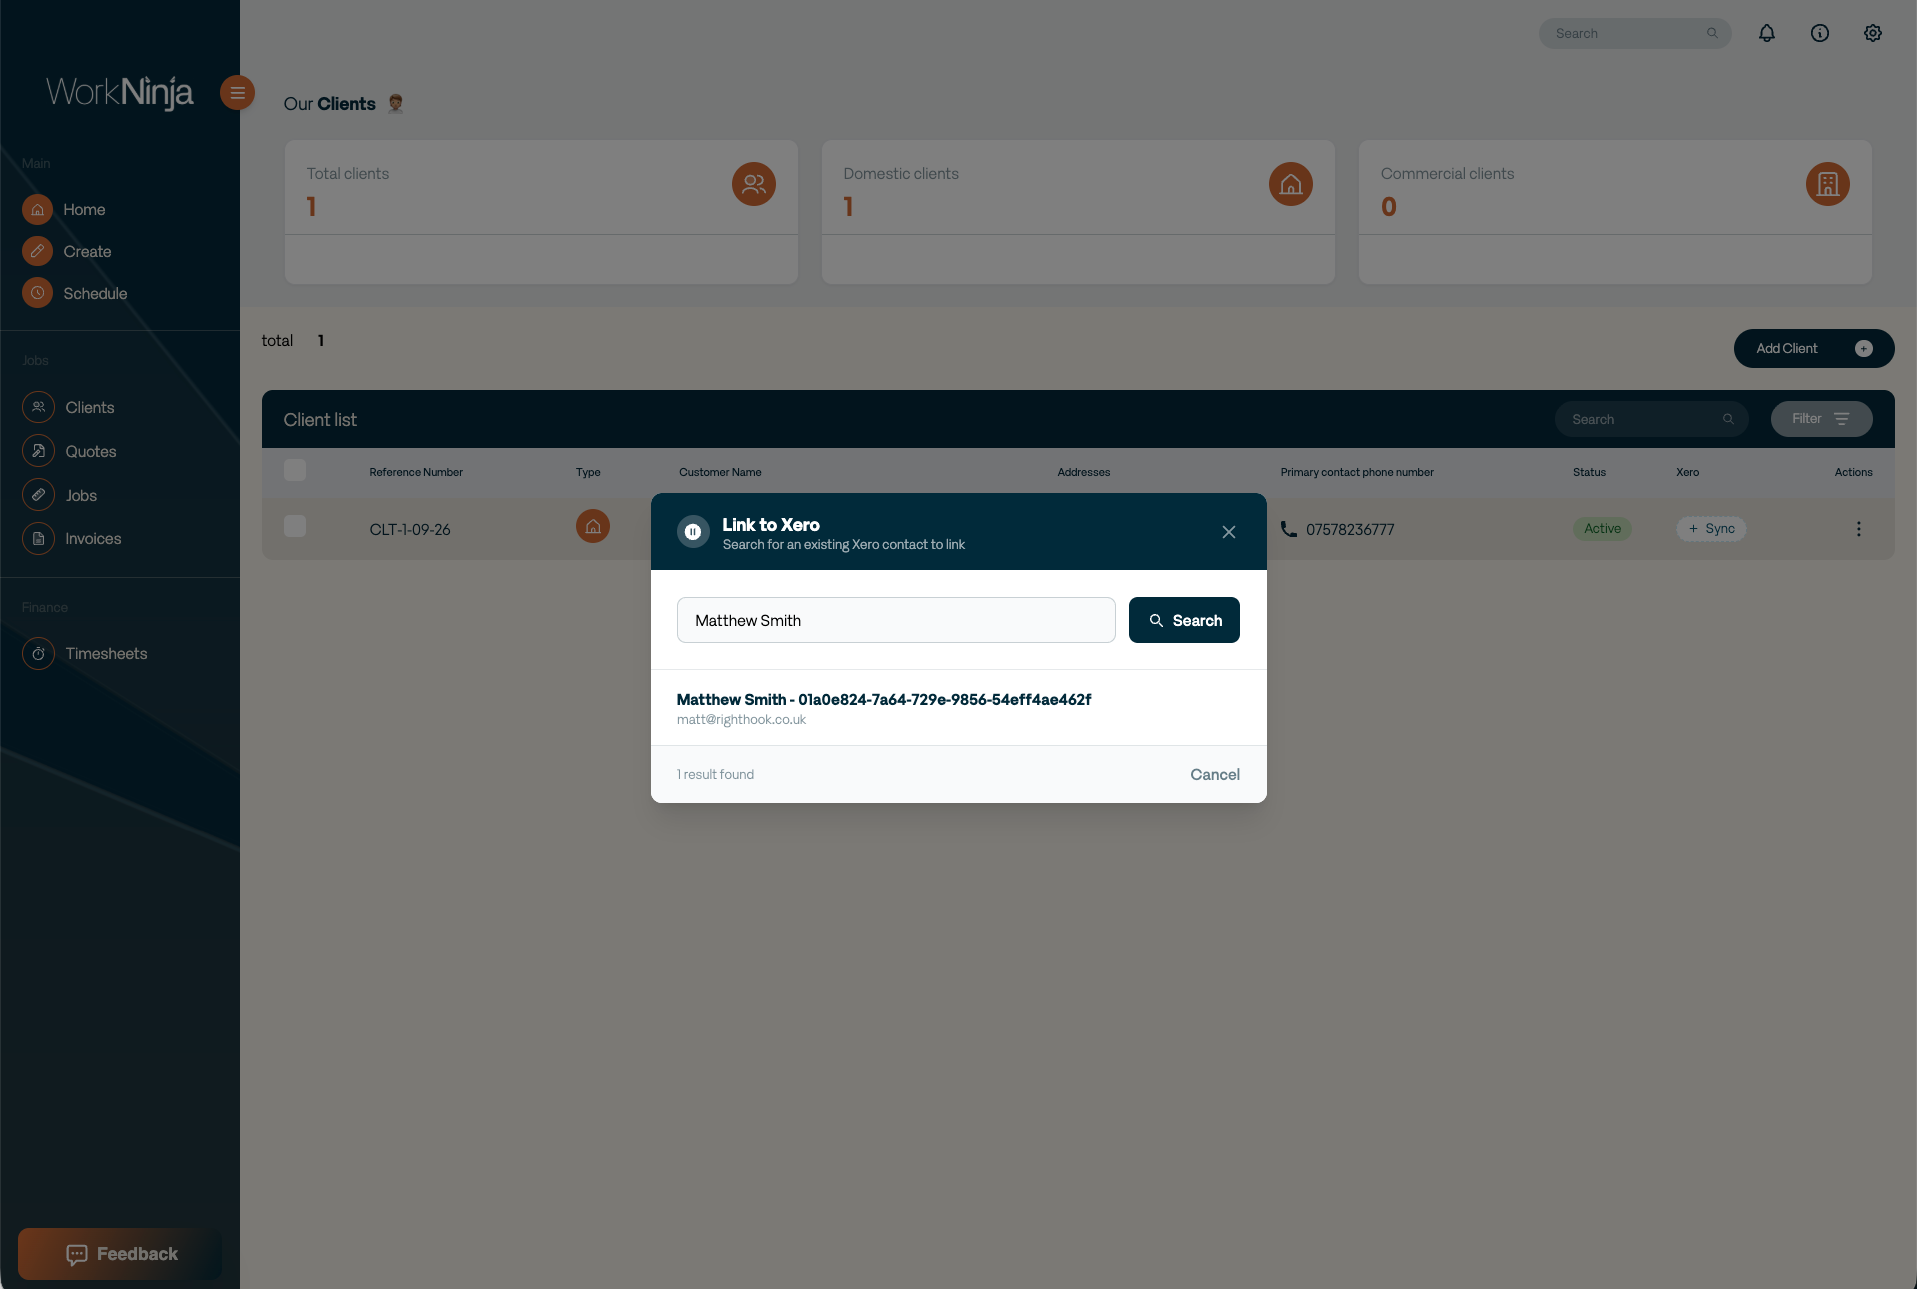
This prevents duplicate customers from being created in Xero.
Syncing Invoices with Xero
Once the relevant client has been linked to Xero, you can begin syncing their invoices.
Go to:
Invoices
A Xero column will appear alongside your invoices.
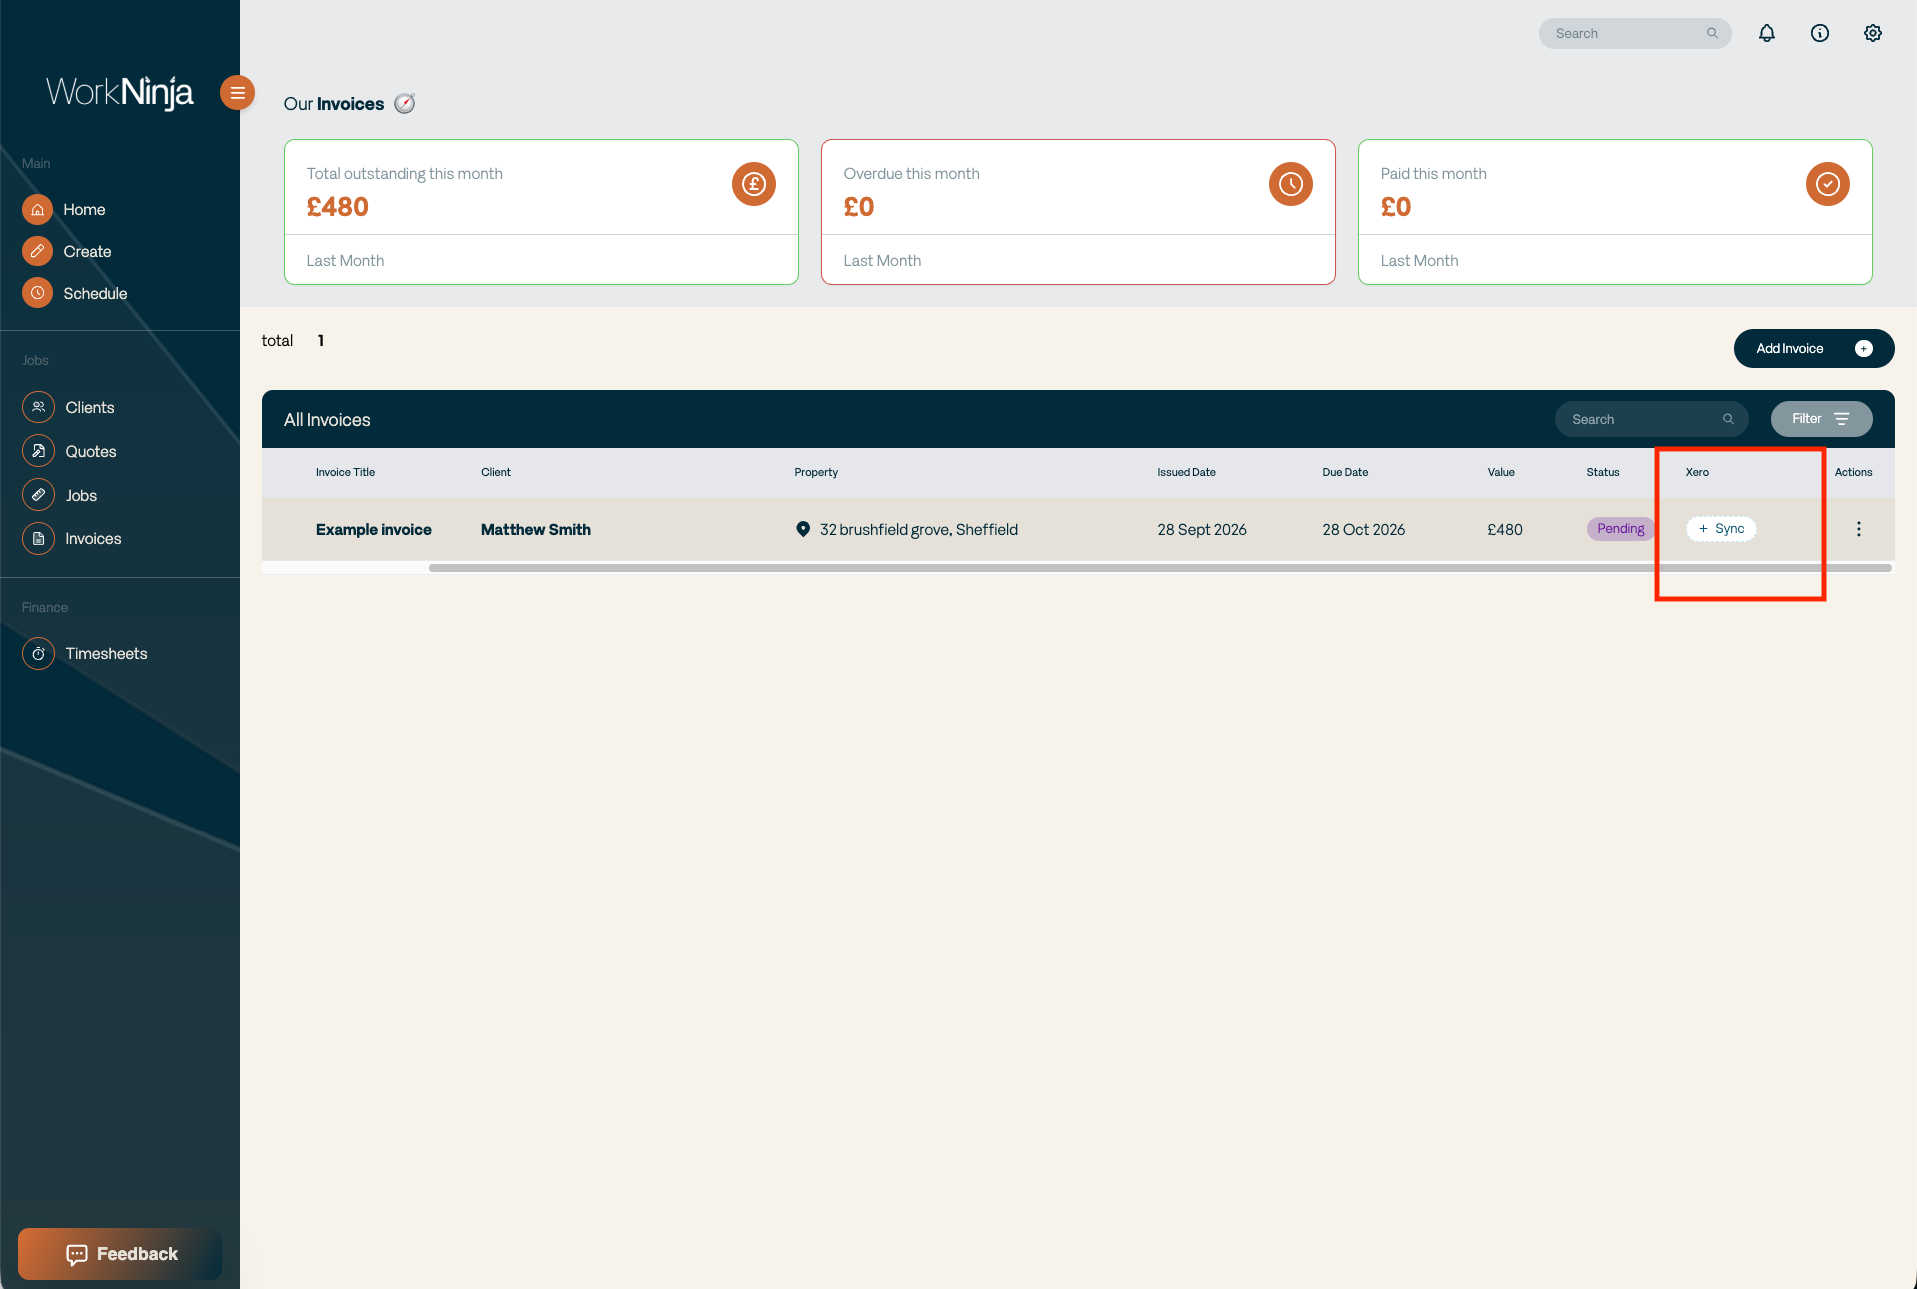
Select the Sync button beside the invoice you want to send to Xero.
As with clients, you will have the option to:
Create a new record in Xero.
Search for and link to an existing record.
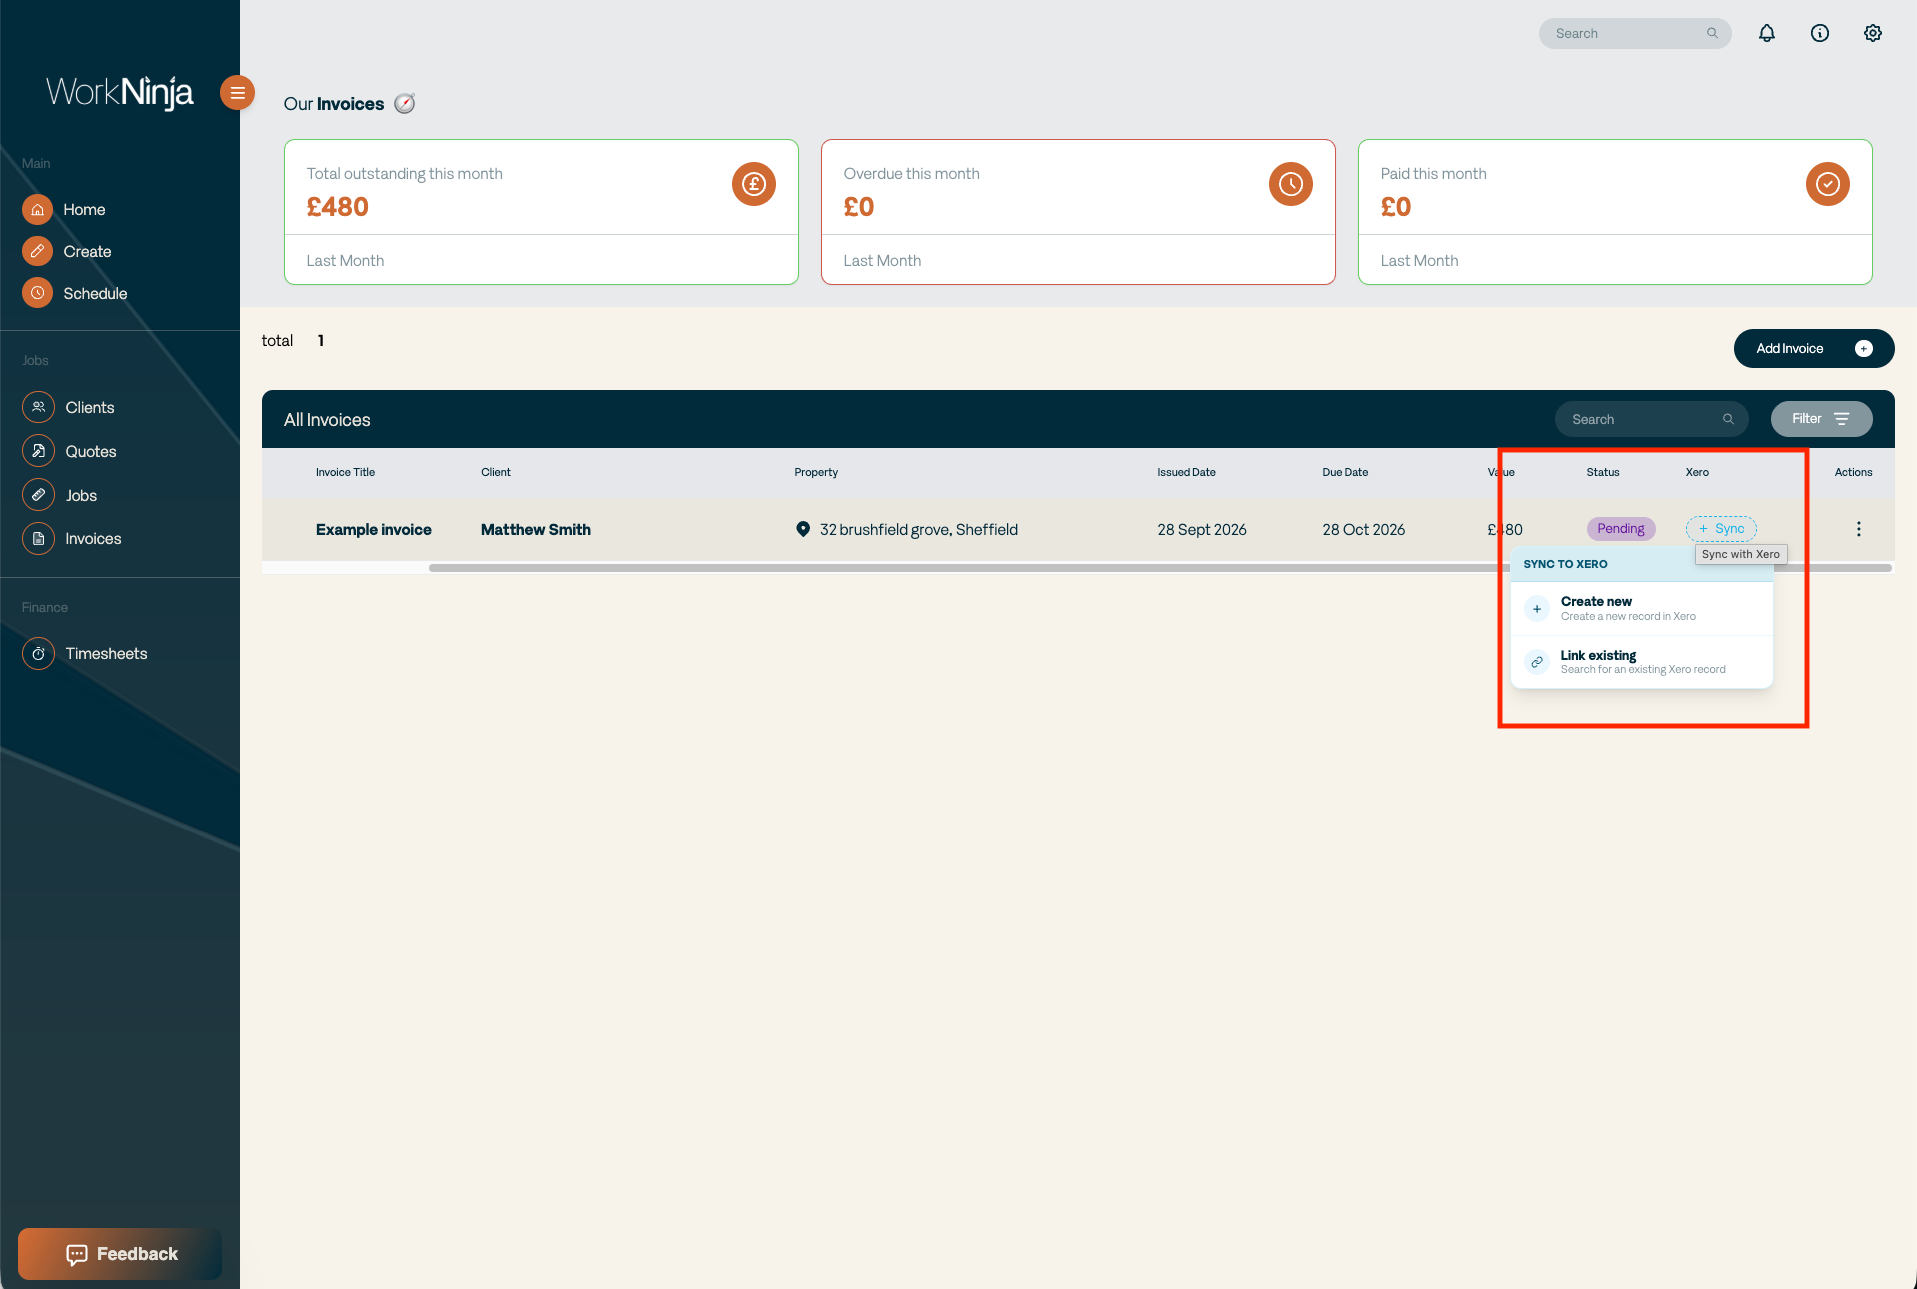
If you are creating the invoice in Xero for the first time, choose the option to create a new record.
Requirements Before an Invoice Can Be Synced
For an invoice to sync successfully:
Xero must be connected to WorkNinja.
The client must already be linked to Xero.
The client must have a billing address.
If the client is not yet linked, return to the Clients page and complete the client sync first.
How Invoice Statuses Stay Up to Date
Once an invoice is connected to Xero, changes made within Xero can be reflected back inside WorkNinja.
For example, if an invoice is reconciled against a payment in Xero and becomes Paid, WorkNinja can automatically update the corresponding invoice status.
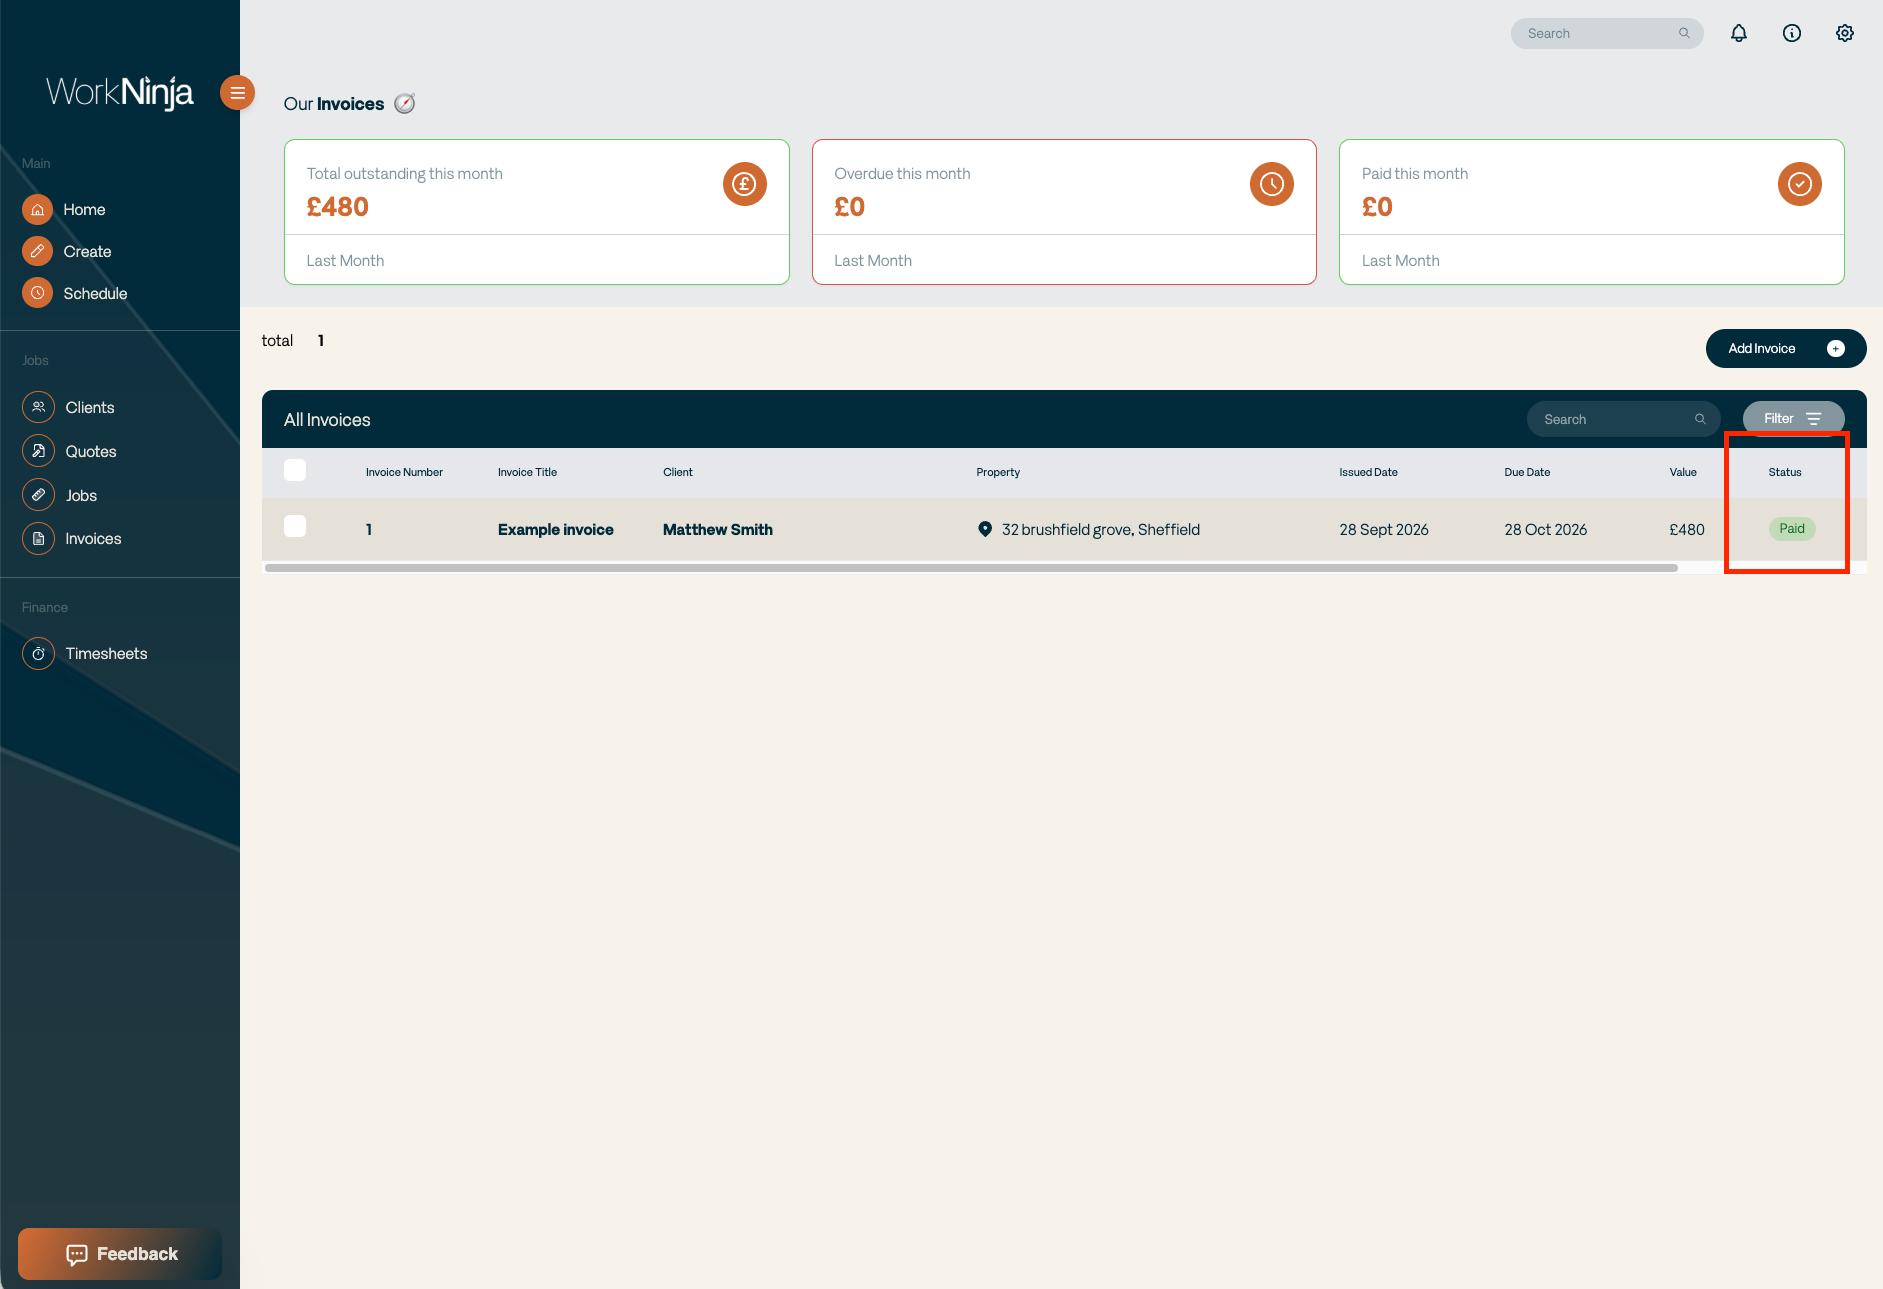
This allows your team to see the current payment status without manually updating the invoice in both systems.
Resyncing an Invoice or Client
If you make further changes to a record inside WorkNinja after it has already been synced, you can send the updated information back to Xero.
Select the Synced button beside the record and choose Resync.
WorkNinja will then update the connected Xero record with the latest applicable information.
This is useful if changes have been made after the original sync.
Unsyncing a Xero Record
If you no longer want a WorkNinja record linked to its Xero counterpart, you can remove the connection.
Select the Synced button beside the client or invoice and choose Unsync.
Unsyncing removes the connection between the WorkNinja record and the Xero record.
Make sure you are certain that the records should no longer be linked before using this option.
Recommended Xero Setup Process
When setting up the integration for the first time, we recommend completing the process in this order:
Connect Xero through Settings → Add On Store.
Configure Tax & Accounting.
Select your default tax rate.
Choose which Xero tax rates should appear in WorkNinja.
Select your default Xero account.
Sync or link your .
Begin syncing invoices.
Following this order helps ensure the required accounting information is in place before you begin sending records to Xero.
Important
Before creating a new customer or invoice in Xero, check whether the record already exists.
Where a record already exists, use Link to Existing rather than creating another one. This helps prevent duplicate contacts or invoices being created in your Xero account.
Remember that an invoice cannot be synced until its client is linked to Xero and the client has a billing address configured.